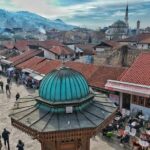
REVIEW · SARAJEVO
Transfer from Sarajevo to Kotor+Herzegovina tour
Book on Viator →Operated by Bosnian Voyager · Bookable on Viator
The day is long, but it never feels like empty highway time. This transfer stacks multiple historic stops—from Konjic’s Ottoman bridge to Mostar’s Old Bridge area—so you arrive in Kotor having already seen plenty of Herzegovina. I especially like the practical pacing (short, focused stops) and the chance to learn as you go, not after. The main drawback to consider is day-of communication and safety consistency; a couple of people reported booking confusion and even texting while driving, so it pays to set expectations early.
You’ll depart at 8:00 am from Sarajevo and spend about 12 hours on the road, using an air-conditioned vehicle. It’s offered in English, with pickup options at a hotel/apartment address (or you can start from Bosnian Voyager’s Sarajevo agency). Lunch isn’t included, so you’ll want a plan for that long sit-down break.
In This Review
- Key highlights you can plan around
- How this long transfer turns into a highlights day
- Pickup, vehicle comfort, and who this suits
- Konjic and Stara Ćuprija: an Ottoman bridge you can actually see
- Jablanica’s Memorial Complex of the Battle on the Neretva
- Mostar walking tour: bazaar, Old Bridge stories, and a museum break
- Buna (Blagaj area) and the Vrelo Bune spring
- Počitelj: an open-air historic village above the Neretva
- Heading into Montenegro: arriving in Kotor with energy intact
- Price and value: why $139 can be fair (and what to watch)
- Communication, English levels, and safety: how to protect your day
- Communication and language
- Safety consistency
- Should you book this Sarajevo to Kotor transfer with stops?
- FAQ
- How long is the Sarajevo to Kotor transfer?
- What stops are included between Sarajevo and Kotor?
- Is pickup available in Sarajevo?
- Is lunch included in the price?
- Is the tour offered in English?
- Are entrance fees included for the stops?
- Can I get a refund if I cancel?
Key highlights you can plan around
- Konjic’s Stara Ćuprija: a restored Ottoman bridge over six arches
- Jablanica’s Battle on the Neretva memorial: a moving stop tied to wartime history
- Mostar walking time: bazaar stroll plus Old Bridge area and a museum visit
- Blagaj area Buna spring: a short detour to Europe’s strong karst spring source
- Počitelj’s open-air feel: a hillside historic village near the Neretva
- Max group size 15 with bottled water and all fees included (lunch excluded)
How this long transfer turns into a highlights day
On paper, this is a transfer from Sarajevo to Kotor. In practice, it’s a route tour—a one-day hit list built around a few places where stopping makes sense. The trick is the timing: each stop is long enough to get the point, not so long that the day drags.
The most helpful part for you is what you’re not stuck with. This isn’t a “we drive past everything” transfer, and it’s not a slow, multi-day tour either. You get compact immersion: quick walking, photo time, and short guided moments—then back onto the road.
One more thing: because it’s a single direction transfer, you don’t have the hassle of bouncing hotels or figuring out multiple transport legs. If your time is tight, that value matters.
You can also read our reviews of more tours and experiences in Sarajevo
Pickup, vehicle comfort, and who this suits
You’re traveling with private transportation in an air-conditioned vehicle, and the group size is capped at 15 travelers. The day starts at 8:00 am, and the pace is built for people who want structure: timed stops in Konjic, Jablanica, Mostar, Buna, Počitelj, and finally Kotor.
You’ll likely appreciate this format if:
- you want to see more than one highlight on the Sarajevo-to-Montenegro route
- you prefer guided stops over self-driving and guessing parking/logistics
- you’re comfortable with an early start and a long seated ride
If you’re the type who hates schedules, keep expectations realistic. The stops are timed (for example, Konjic and Jablanica are 30 minutes each), so you’ll want to use your time efficiently.
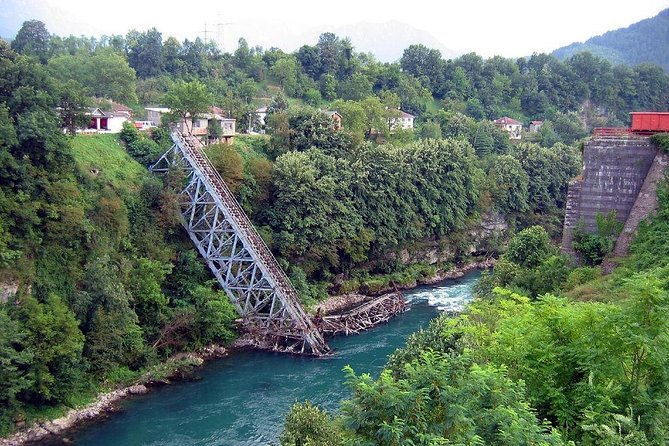
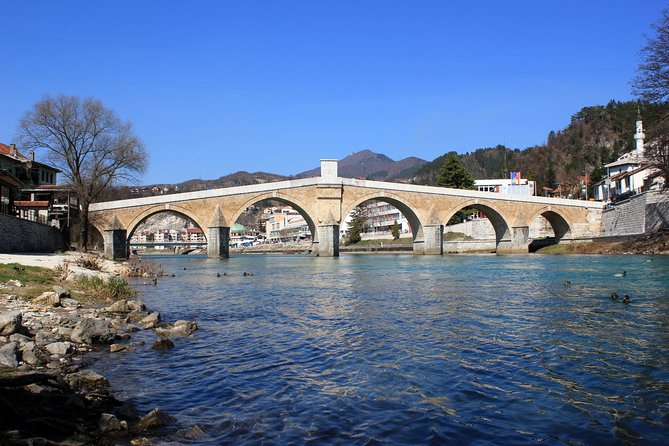
Konjic and Stara Ćuprija: an Ottoman bridge you can actually see
Konjic is a mountainous, wooded town along the Neretva River, about 60 kilometers from Sarajevo. The star stop here is Konjička Stara Ćuprija, often described as the best-preserved Ottoman bridge in Bosnia and Herzegovina.
This isn’t just a pretty photo spot. The bridge was built between 1682 and 1683 by Ali-aga Hasečić, and it spans the river on six slightly pointed stone arches. During World War II, the arches were destroyed by the retreating German army in March 1945, then the bridge was rebuilt in its original state between 2003 and 2009. It’s now protected as a National Monument of Bosnia and Herzegovina.
30 minutes sounds short, but it’s the right length for this kind of stop: a walk for scale, a quick read of what you’re looking at, and a calm moment by the river. Your best move is to arrive ready to look at details: the arches, the stonework, and the way the bridge sits in a river valley.
Potential downside: because the stop is brief, you won’t get a full, slow experience. If you’re the type who loves architecture and could spend an hour here alone, you might feel slightly rushed.
Jablanica’s Memorial Complex of the Battle on the Neretva
After Konjic, the day shifts gears. The Memorial Complex of the Battle on the Neretva in Jablanica is dedicated to the battle and is part museum, part remembrance site. It opened 12 November 1978 for the 35th anniversary of the battle.
What makes this stop meaningful is the way it’s tied to a specific moment. The complex marks the place where partisans made a critical crossing of the Neretva to rescue the wounded and sick. A related monument on Makljen near Prozor is also part of the broader story, and the commemorations involved Josip Broz Tito at the ceremonial opening.
Your stop here is about 30 minutes, so think of it as a respectful “pause and understand” moment rather than a full history lesson. If you like context while you travel, this is a strong spot because it explains why the region’s landmarks carry weight.
Possible consideration: this is an emotional, reflective location. If you prefer lighter sightseeing every hour, you may want to mentally pace yourself for this stop.
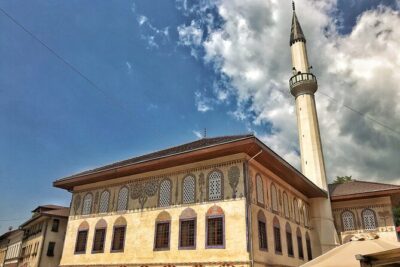
Mostar walking tour: bazaar, Old Bridge stories, and a museum break
Mostar is the big highlight on this route, and you’ll get around 2 hours for a guided walking tour. The focus is the city center area where you see the contrast of Ottoman and Austro-Hungarian architecture side by side.
Your plan in Mostar usually includes:
- a walk through the bazaar
- time at the Old Bridge area, with stories tied to the bridge
- a visit to one museum connected to Mostar’s Old Bridge, culture, and traditions
- then lunch at a restaurant, before the day continues with a couple more stops before the tour ends
A practical note: since lunch isn’t included, this is where budget and timing matter most. The tour includes the general lunch portion, but you’ll still need to pay for your meal. If you’re picky about food, use that moment to ask what’s available rather than waiting until you’re hungry and stressed.
Mostar can be busy, and 2 hours disappears quickly once you’re walking, stopping for photos, and listening to the guide. Your best “value move” is to keep your phone charged and your walking shoes ready. This is a see-it-now kind of stop.
One more consideration from the experiences shared: language and guiding style can vary. If English is a must, it helps to be ready with simple questions so you can still get value even if your driver’s English is limited.
- Fall of Yugoslavia, Sarajevo War Tour with Tunnel of Hope Museum and Frontlines
★ 5.0 · 1,314 reviews
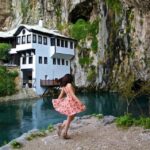


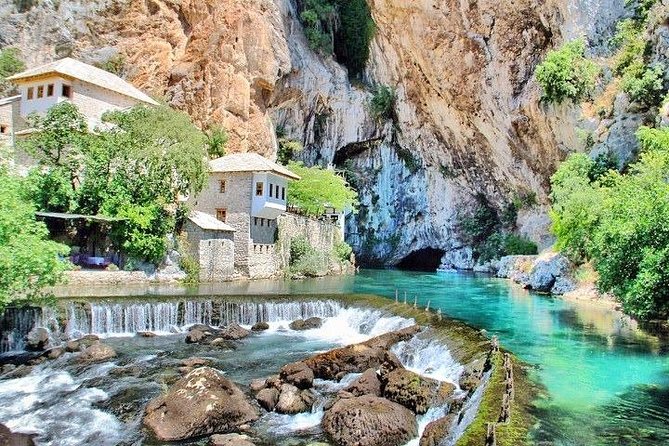
Buna (Blagaj area) and the Vrelo Bune spring
Then you reach the “nature with personality” detour: the Buna area. The Buna is a short river system fed by a spring near Blagaj, known as Vrelo Bune.
This is the stop people love because it’s hard to fake. The spring is described as one of the strongest in Europe, and the water is extremely cold—fed by a karstic spring source. The Buna flows west for about 9 kilometers, meandering through villages like Blagaj, Kosor, Malo Polje, Hodbina, and joining the Neretva at Buna settlement.
You’re given about 1 hour here. That’s enough to get a feel for the spring area and do a short walk without eating your whole day.
If you’re someone who hates rushed “scenic” stops, focus on this: spring water creates its own atmosphere. Even in a short window, you can get real sensory payoff—sound, temperature, and the way the water defines the area.
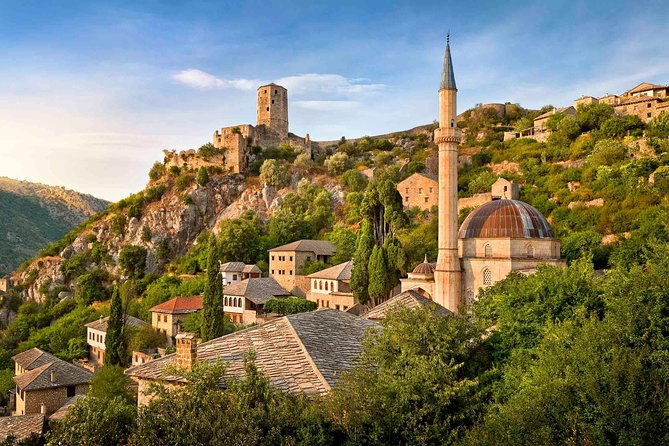
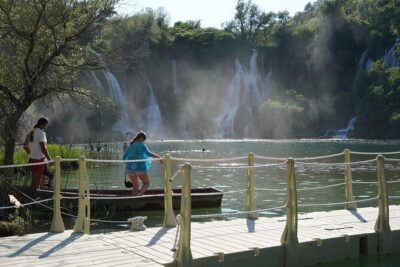
Počitelj: an open-air historic village above the Neretva
Next is Počitelj, a historic village often described as an open-air museum. It sits on the left bank of the Neretva, on the main road between Mostar and Metković.
You’re stopping for about 1 hour, so again, it’s a short, targeted experience. But Počitelj is the kind of place where the setting does the work. It’s about 30 kilometers south of Mostar and roughly 3 kilometers from the center of Čapljina, meaning you’re still close enough to feel the Mostar influence while getting away from the densest crowds.
Your guide will share the story of why Počitelj matters—often framed as a “jewel in the crown” of the Bosnian kingdom. Even if you don’t catch every detail, you’ll likely leave with the key idea: this is a settlement where location and architecture reinforce each other.
Possible drawback: if it’s hot or rainy, you’ll want to dress for uneven walking and short climbs. The stop is timed, but the terrain can still feel a bit more active than you expect.
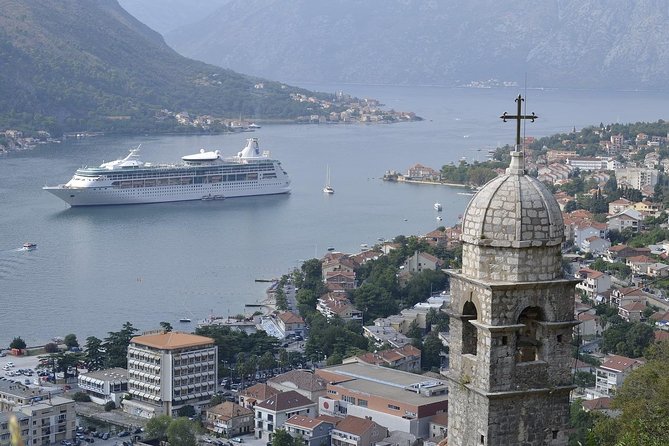
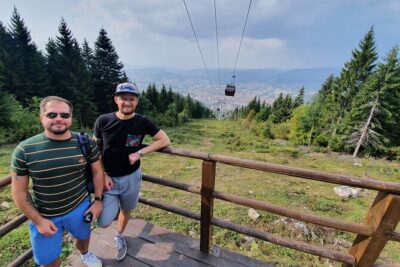
Heading into Montenegro: arriving in Kotor with energy intact
After Počitelj, the route goes directly toward the Montenegrin border and then Kotor, the final stop. You’ll have about 2 hours in Kotor as part of this transfer.
That arrival window is important: it’s long enough to get oriented and do a quick walk, but not long enough to plan an all-day sightseeing marathon. So think of your Kotor time as a landing, not a full tour.
If you’re continuing your trip in Montenegro the next day, prioritize two things in that 2-hour window:
- get bearings in the old-town area (even a short loop helps)
- identify where you’ll want to return later for a longer visit
Also, since the day starts early and involves a lot of seated time, you’ll feel the benefit of having some structured movement at the end.
Price and value: why $139 can be fair (and what to watch)
The price is $139.38 per person for a day that runs about 12 hours, includes an air-conditioned vehicle, bottled water, private transportation, and all fees and taxes. That bundled pricing is a real value point because you’re not managing each stop’s separate entry or paying random “extras” along the way.
The big exception is lunch, which isn’t included. That’s not unusual for tours, but it matters for budgeting. If you’re traveling as a couple, a family, or with picky eaters, lunch costs can shift your effective value more than you’d expect.
Now, here’s the part you should pay attention to: communication can affect the final cost and experience. One person reported confusion between booking layers that led to an unexpected additional payment. Another issue raised was that a driver didn’t have proper permits for cross-border transport for money. Those aren’t details you should ignore.
My practical advice: before you go, confirm what’s included in your final offer and make sure the service matches your booking. Then on the day, keep your expectations aligned with a guided transfer format, not a guaranteed step-by-step “tour guide at every stop” for the full time.
Communication, English levels, and safety: how to protect your day
This is where your “due diligence” pays off. The experiences shared point to two separate issues that can change your day.
Communication and language
English is listed as the tour language, but at least one person reported a driver with limited English and stops that didn’t feel like a true guided tour. If you care about explanations, you’ll get more value if you:
- ask clear questions at the start of the day
- pick one or two places you want deeper context for (Mostar is a good target)
- use short, simple follow-ups like: What’s the key story here? What should I notice?
You’ll still get the sights, but explanations can vary.
Safety consistency
One caution in the feedback was about a driver texting while driving. I can’t verify anything beyond the information provided, but the takeaway is simple: if you notice risky behavior, speak up immediately and ask them to stop. During long transfers, your comfort and safety are not negotiable.
If you’re traveling with kids, elderly parents, or anyone who is sensitive to risk, this is one place where paying for a reputable service and setting expectations matters.
Should you book this Sarajevo to Kotor transfer with stops?
If you want an efficient route day—Sarajevo to Kotor without losing the chance to see Konjic, Mostar, Blagaj/Buna spring, and Počitelj—this makes sense. The pricing feels fair for a bundled day with vehicle, water, and fees included, and the planned stops are the kind that add real meaning to the drive.
I’d book it if:
- you like a guided structure and short, focused sightseeing
- you’re fine paying for lunch separately
- you want a one-day way to connect Bosnia and Montenegro
I’d be more cautious if:
- you need very strong English guiding at every stop
- you’re sensitive to last-minute confusion about what you booked
- cross-border timing and permits are a concern for you
If you go in with clear expectations—expect a long day, short stops, and some variation in guiding style—you’ll likely find this transfer gives you more than a simple ride.
FAQ
How long is the Sarajevo to Kotor transfer?
It runs for about 12 hours on average, starting at 8:00 am.
What stops are included between Sarajevo and Kotor?
You’ll stop in Konjic, Jablanica, Mostar, Buna (Blagaj spring area), Počitelj, and then arrive in Kotor.
Is pickup available in Sarajevo?
Yes. You can start from Bosnian Voyager’s agency in Sarajevo, or you can request pickup at the address of a hotel or apartment.
Is lunch included in the price?
No. Lunch isn’t included, so you’ll pay for it during the Mostar portion of the day.
Is the tour offered in English?
Yes, it’s offered in English.
Are entrance fees included for the stops?
Admission tickets are listed as free for the stops mentioned, and the tour includes all fees and taxes.
Can I get a refund if I cancel?
Yes. You can cancel for a full refund if you cancel up to 24 hours in advance of the experience’s start time.
You Might Also Enjoy
More Private Drivers in Sarajevo
More Tours in Sarajevo
- Fall of Yugoslavia, Sarajevo War Tour with Tunnel of Hope Museum and Frontlines
★ 5.0 · 1,314 reviews


More Tour Reviews in Sarajevo
- Fall of Yugoslavia, Sarajevo War Tour with Tunnel of Hope Museum and Frontlines
★ 5.0 · 1,314 reviews